The first steps for my home brew rig were pretty standard projects. I built a keezer, bought a large brew pot with an immersion chiller, and modified the brew pot to include a draining ball valve and thermometer. As a Belgian fan, the yeast is the most important component of my brews, so I also got some basic lab ware to maintain yeast cultures. Beside maintaining healthy cultures, fermentation temperature is one of the most important factors determining the behavior of the yeast. After a few batches it became obvious that the next best improvement would be temperature control during fermentation.
There are many interesting and useful approaches to controlling fermentation temperatures. Many use wet cloths and fans for cooling. More sophisticated brewers such as those at my local home brew shop build something similar to a keezer and simply change the temperature setpoint. This is probably the most sensible, economical approach.
My problem was that I had also purchased a plastic conical tank and butterfly valves to eventually upgrade to a 16 gallon conical fermenter. I needed a container for the fermenter that would be front opening. I considered a large refrigerator, but I could find no refrigerator in an acceptable price range that was large enough. I decided to build a wooden cabinet and control its temperature by pumping chilled or heated water through a closed system.
Construction
 I’ve seen many posted attempts at building fermentation chambers in the forums, and this one is a very large version of those. Many of the attempts described used polystyrene and plywood as the primary building material. The greatest complaint is that they are not durable in the case of leaks. I tried to address this with my build.
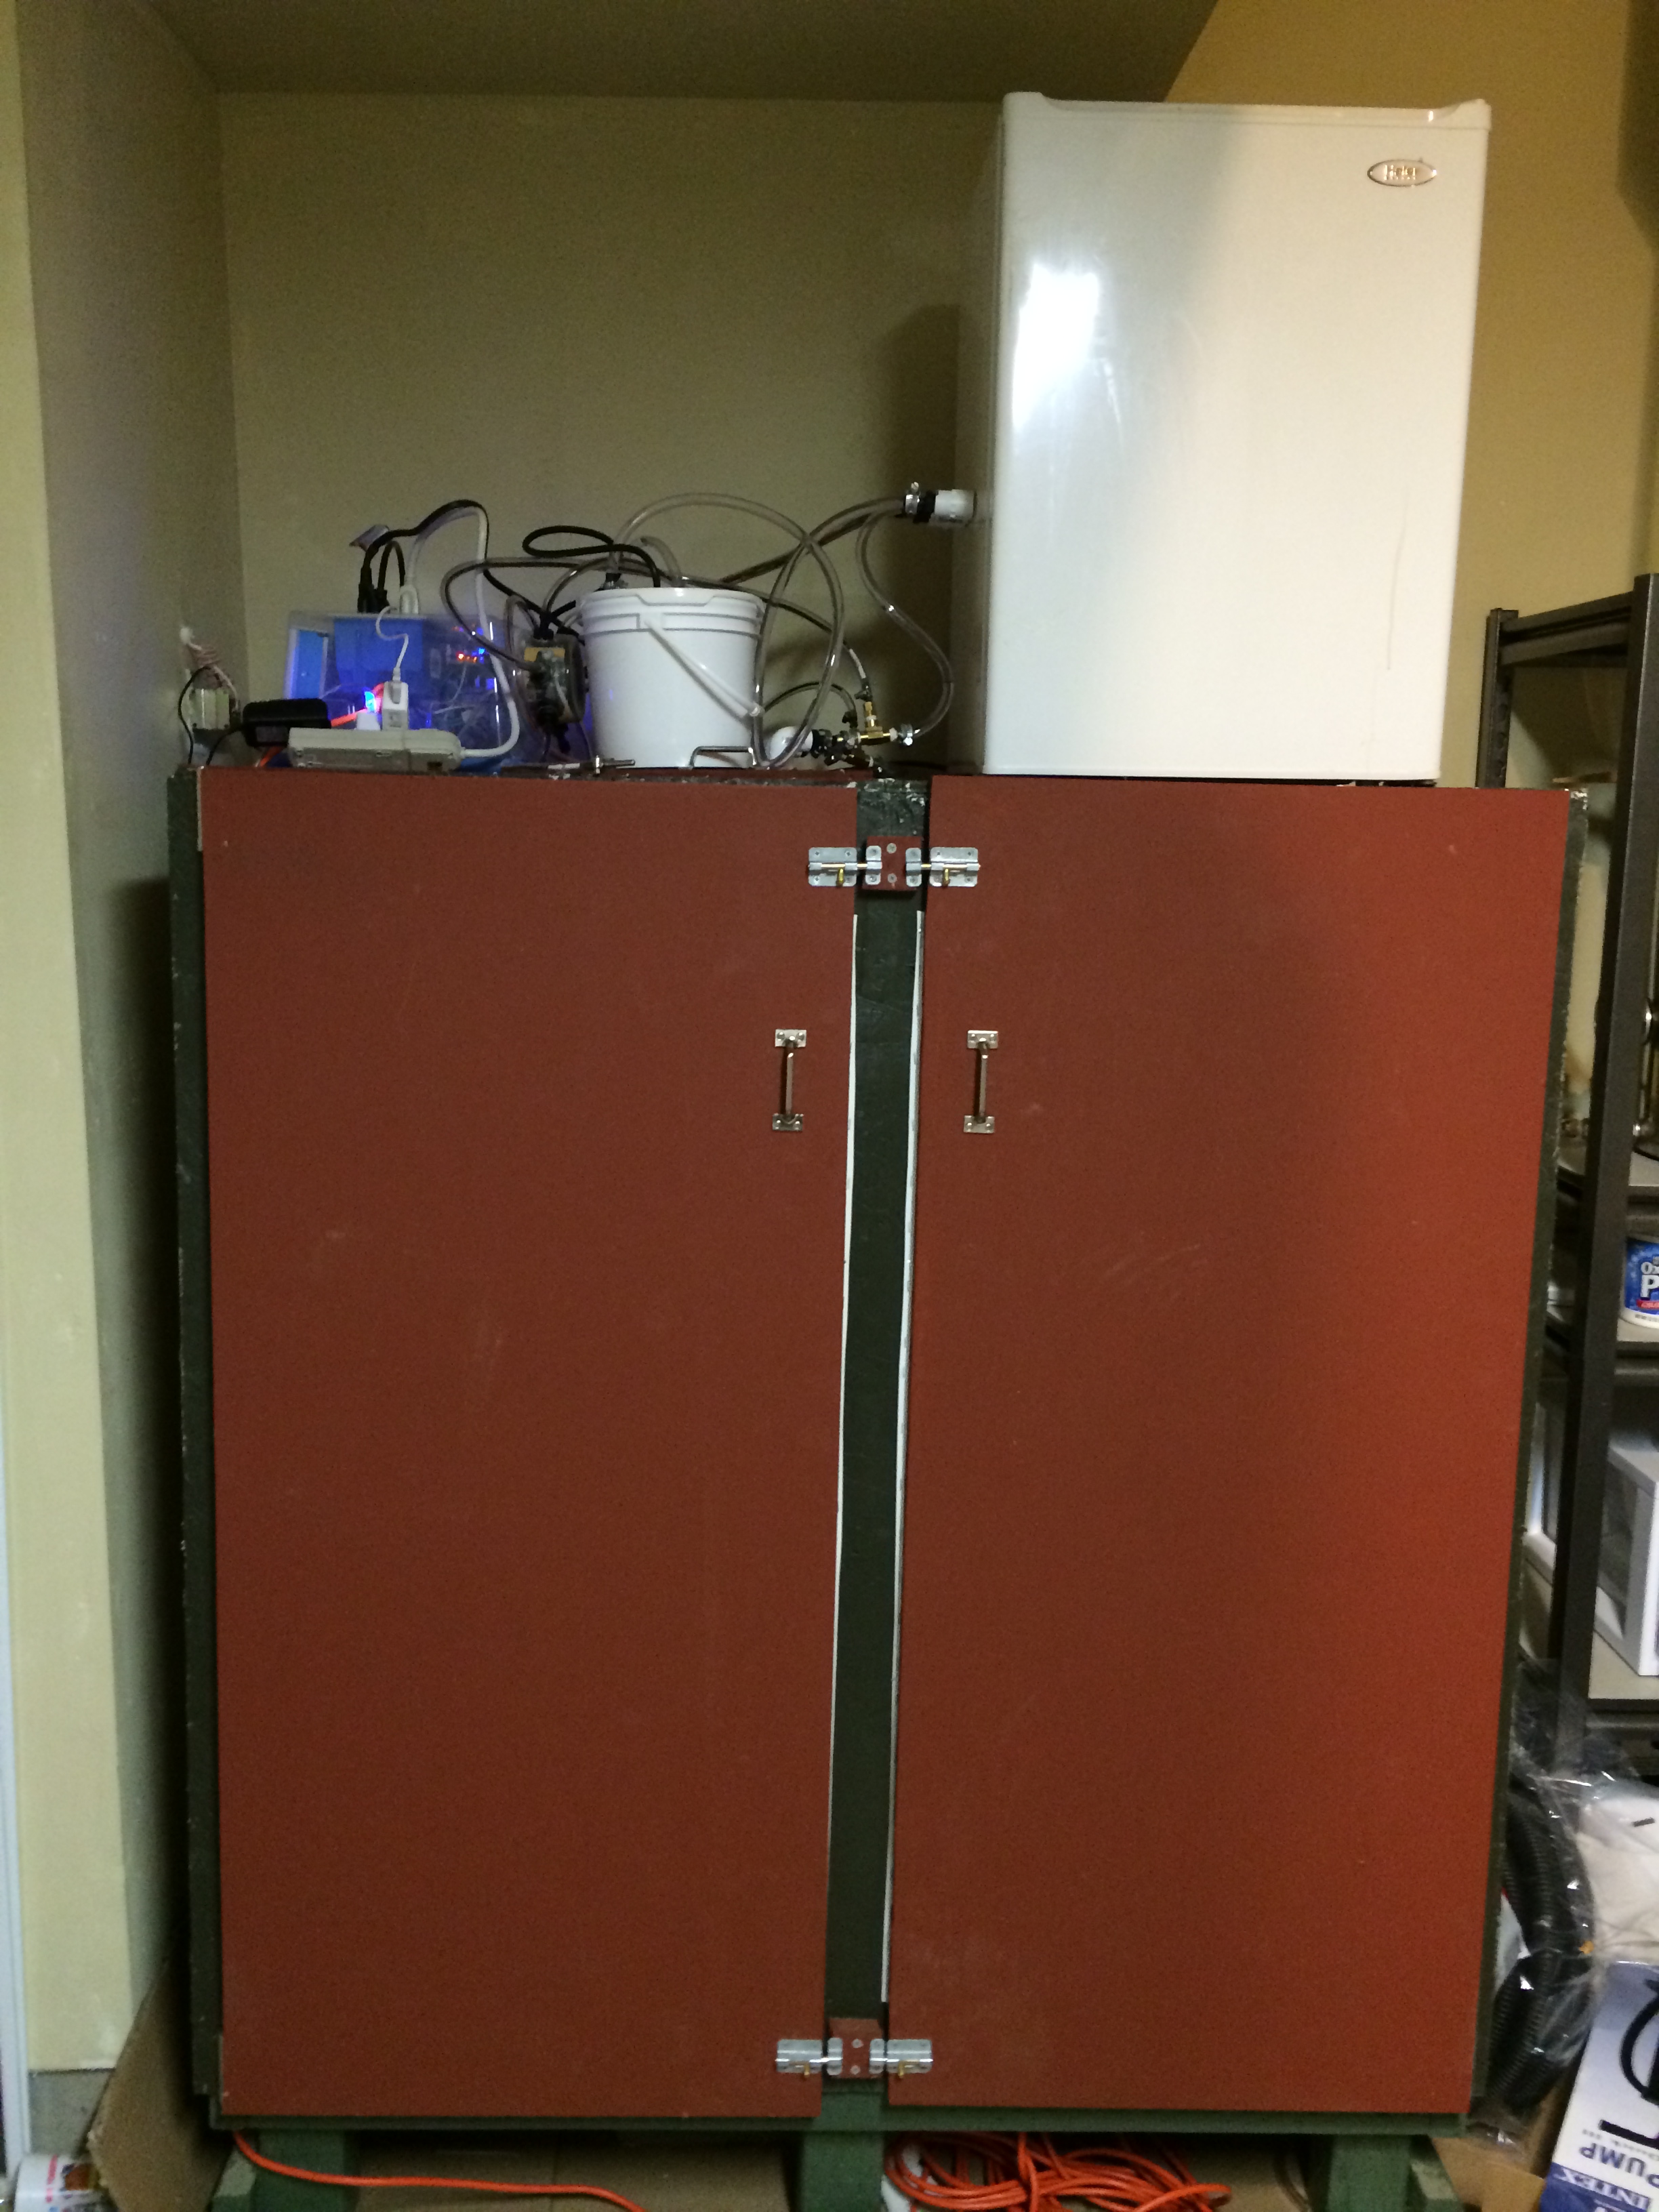
My cabinet reveals the abysmal state of my woodworking, but it performs the job well enough. It has 6 vertical 4×4 supports with 3 horizontal 2×4 collars that support the bottom, internal ceiling, and top. Since this cabinet was to be located in my thermally labile garage, the walls are two layers of plywood for improved insulation. The two front doors are made of a higher grade plywood with latches to keep a tight seal. The doors and hatch are sealed with weather stripping.
To deal with the problem plywood falling apart when wet, all internal and external edges are sealed with caulk and the cabinet painted with outdoor acrylic paint that was lying around the garage. Several others have tried this and still had problems after large leaks. To deal with large leaks, the internal floor of the cabinet is lined and covered with ceramic tile. A 1/2 in PVC drain with a U-trap exits the bottom of the cabinet and drains in to a large pan under the cabinet.

Fermentation cabinet in use
Heat Exchange Circuit
To heat or cool the cabinet, I created small closed fluid circuit. I use tap water as the exchange medium. An aquarium sized centrifugal pump pushes fluid through the wall of a small refrigerator.
The fluid travels through several feet of copper tubing, which rests on the evaporator plate. The control system uses a relay to control the power to the refrigerator, which cools the fluid when running.

Copper coil
The fluid then passes through two aluminum blocks which are fastened to thermoelectric chips. These are often used for cooling, but I run these in reverse to heat the fluid. The control system can adjust the power to these chips. The heat moved to the fluid is taken from the opposite side of the chips, so small computer fans are used to transfer heat to the cool side of the chip so that it can continue to heat adequately.
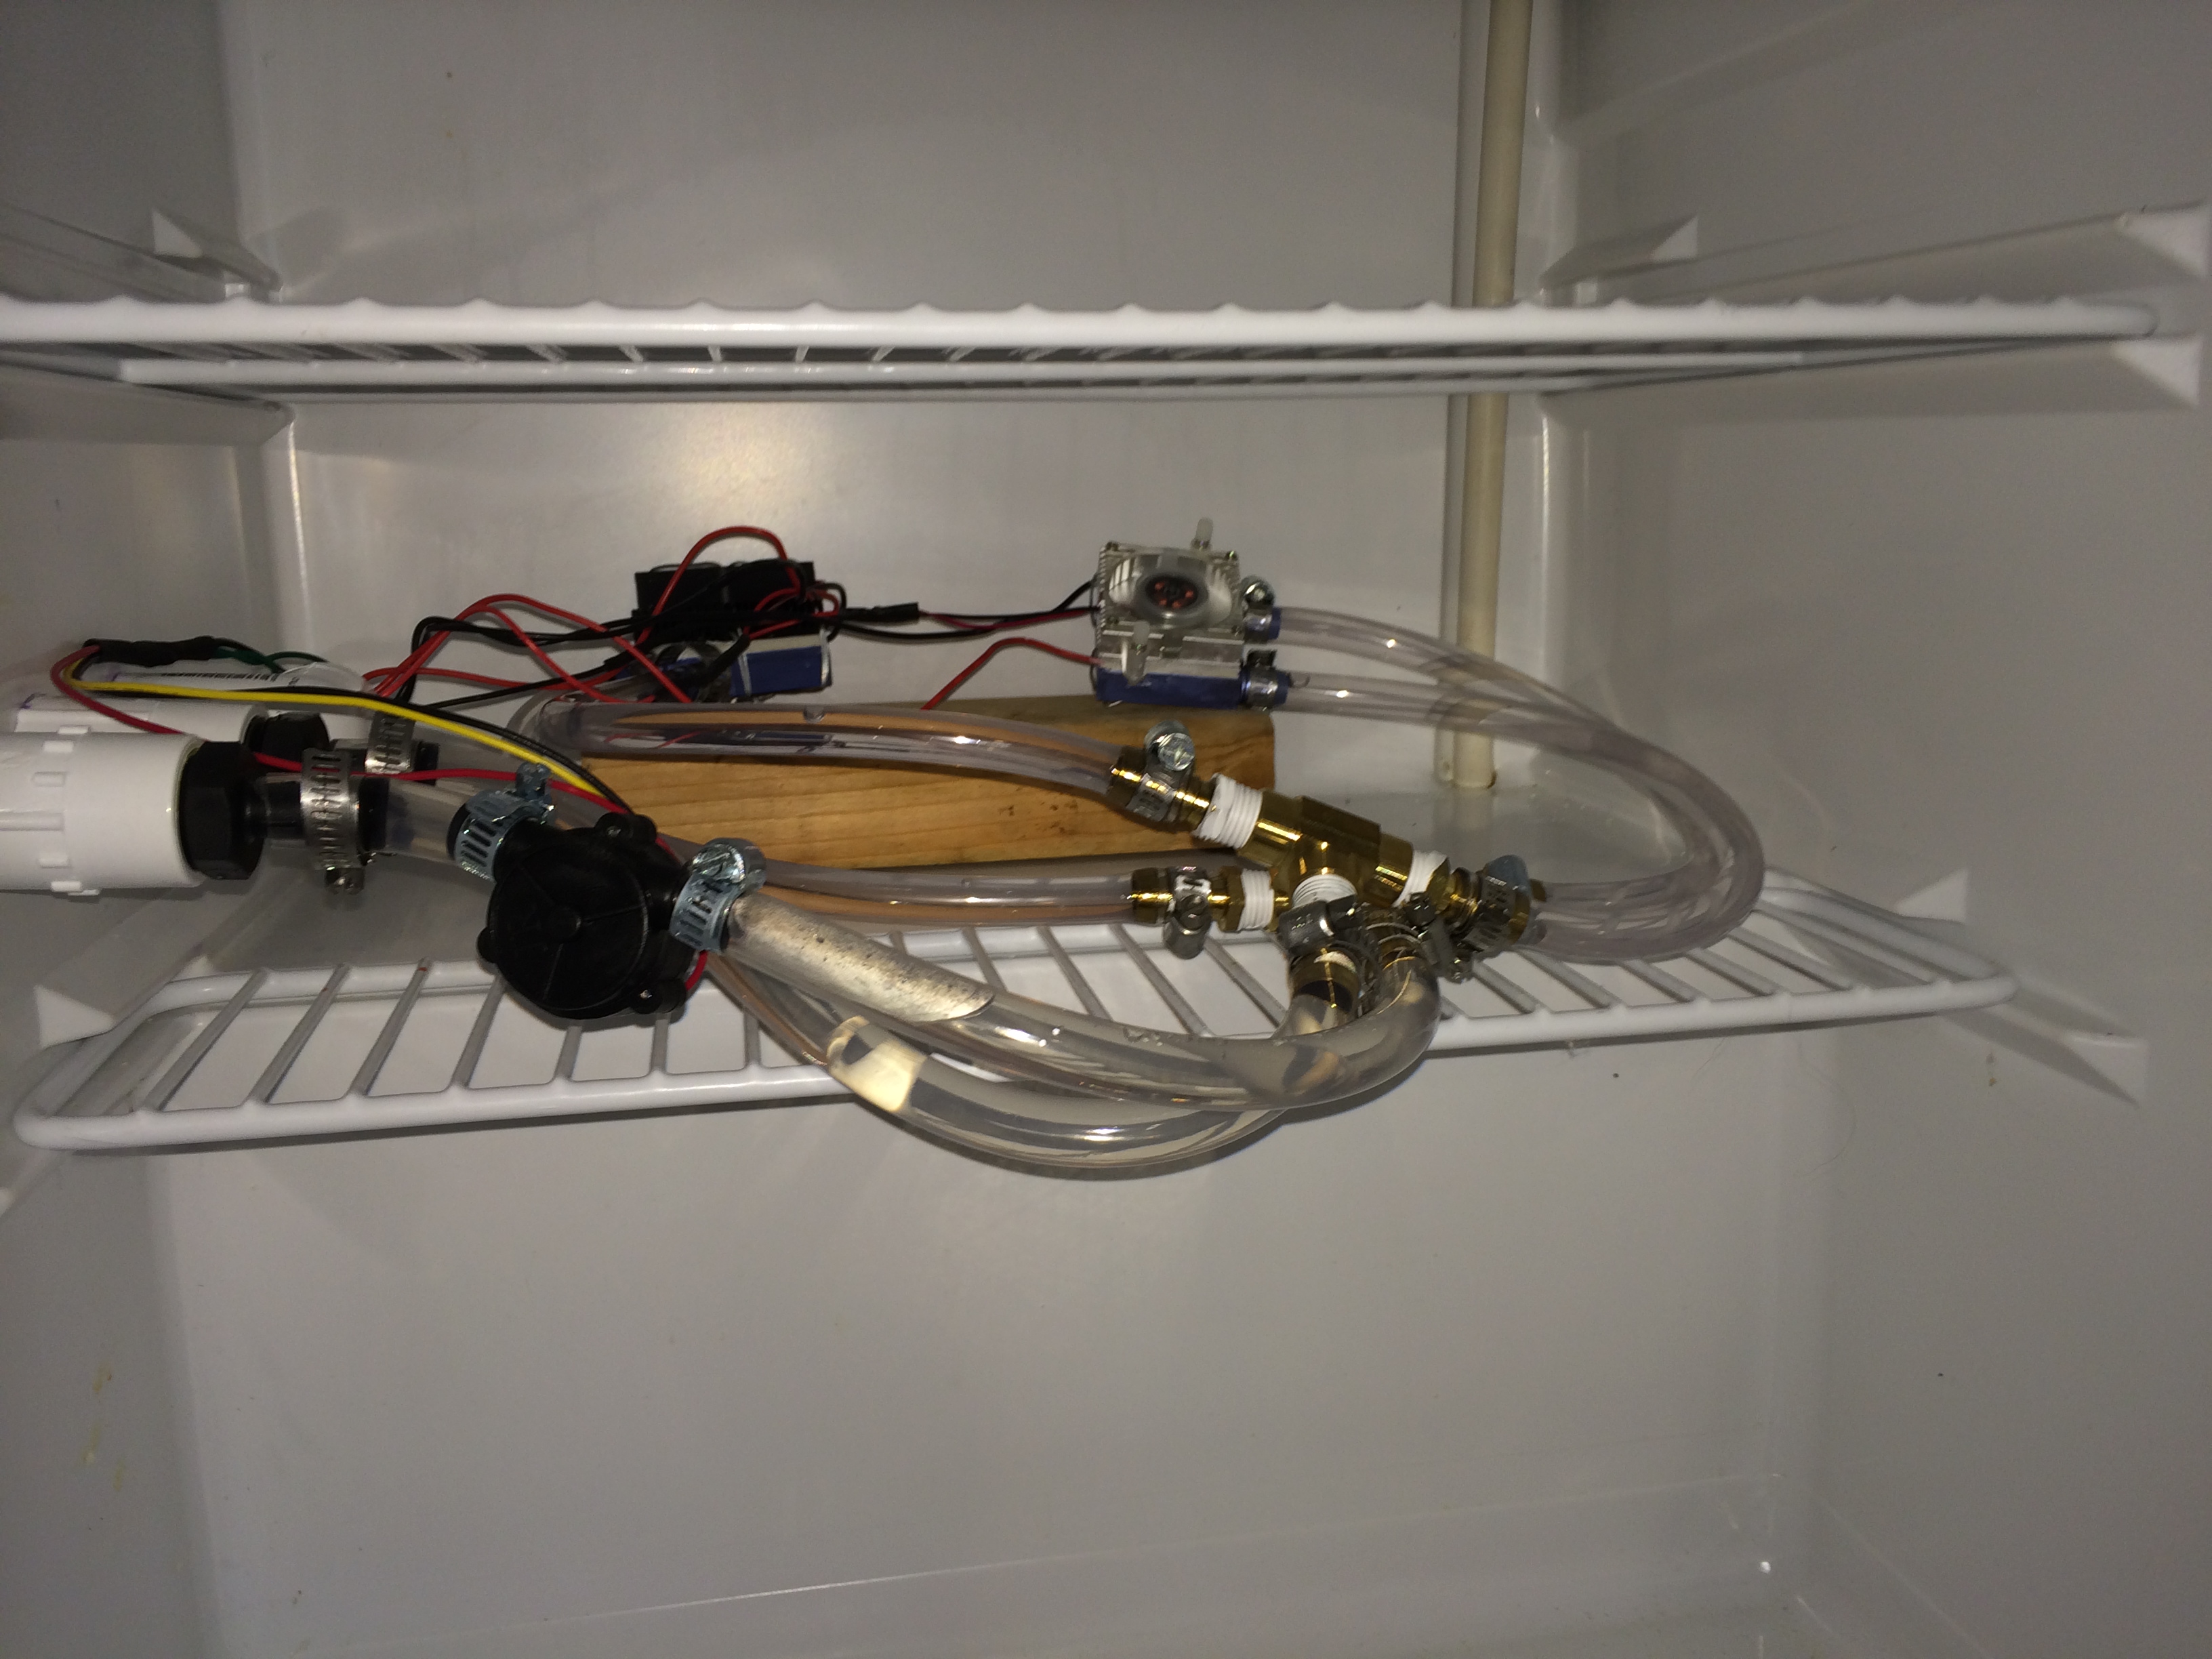
Thermoelectric chips and Hall effect flow sensor
The fluid next passes back out of the refrigerator and through the cabinet ceiling. Here, it either passes through a radiator with another fan to provide forced convection or goes into an immersed coil in my fermenter.

Radiator with fan in the cabinet ceiling
The fluid passes back out of the cabinet ceiling and to the pump, closing the circuit.
Electronics
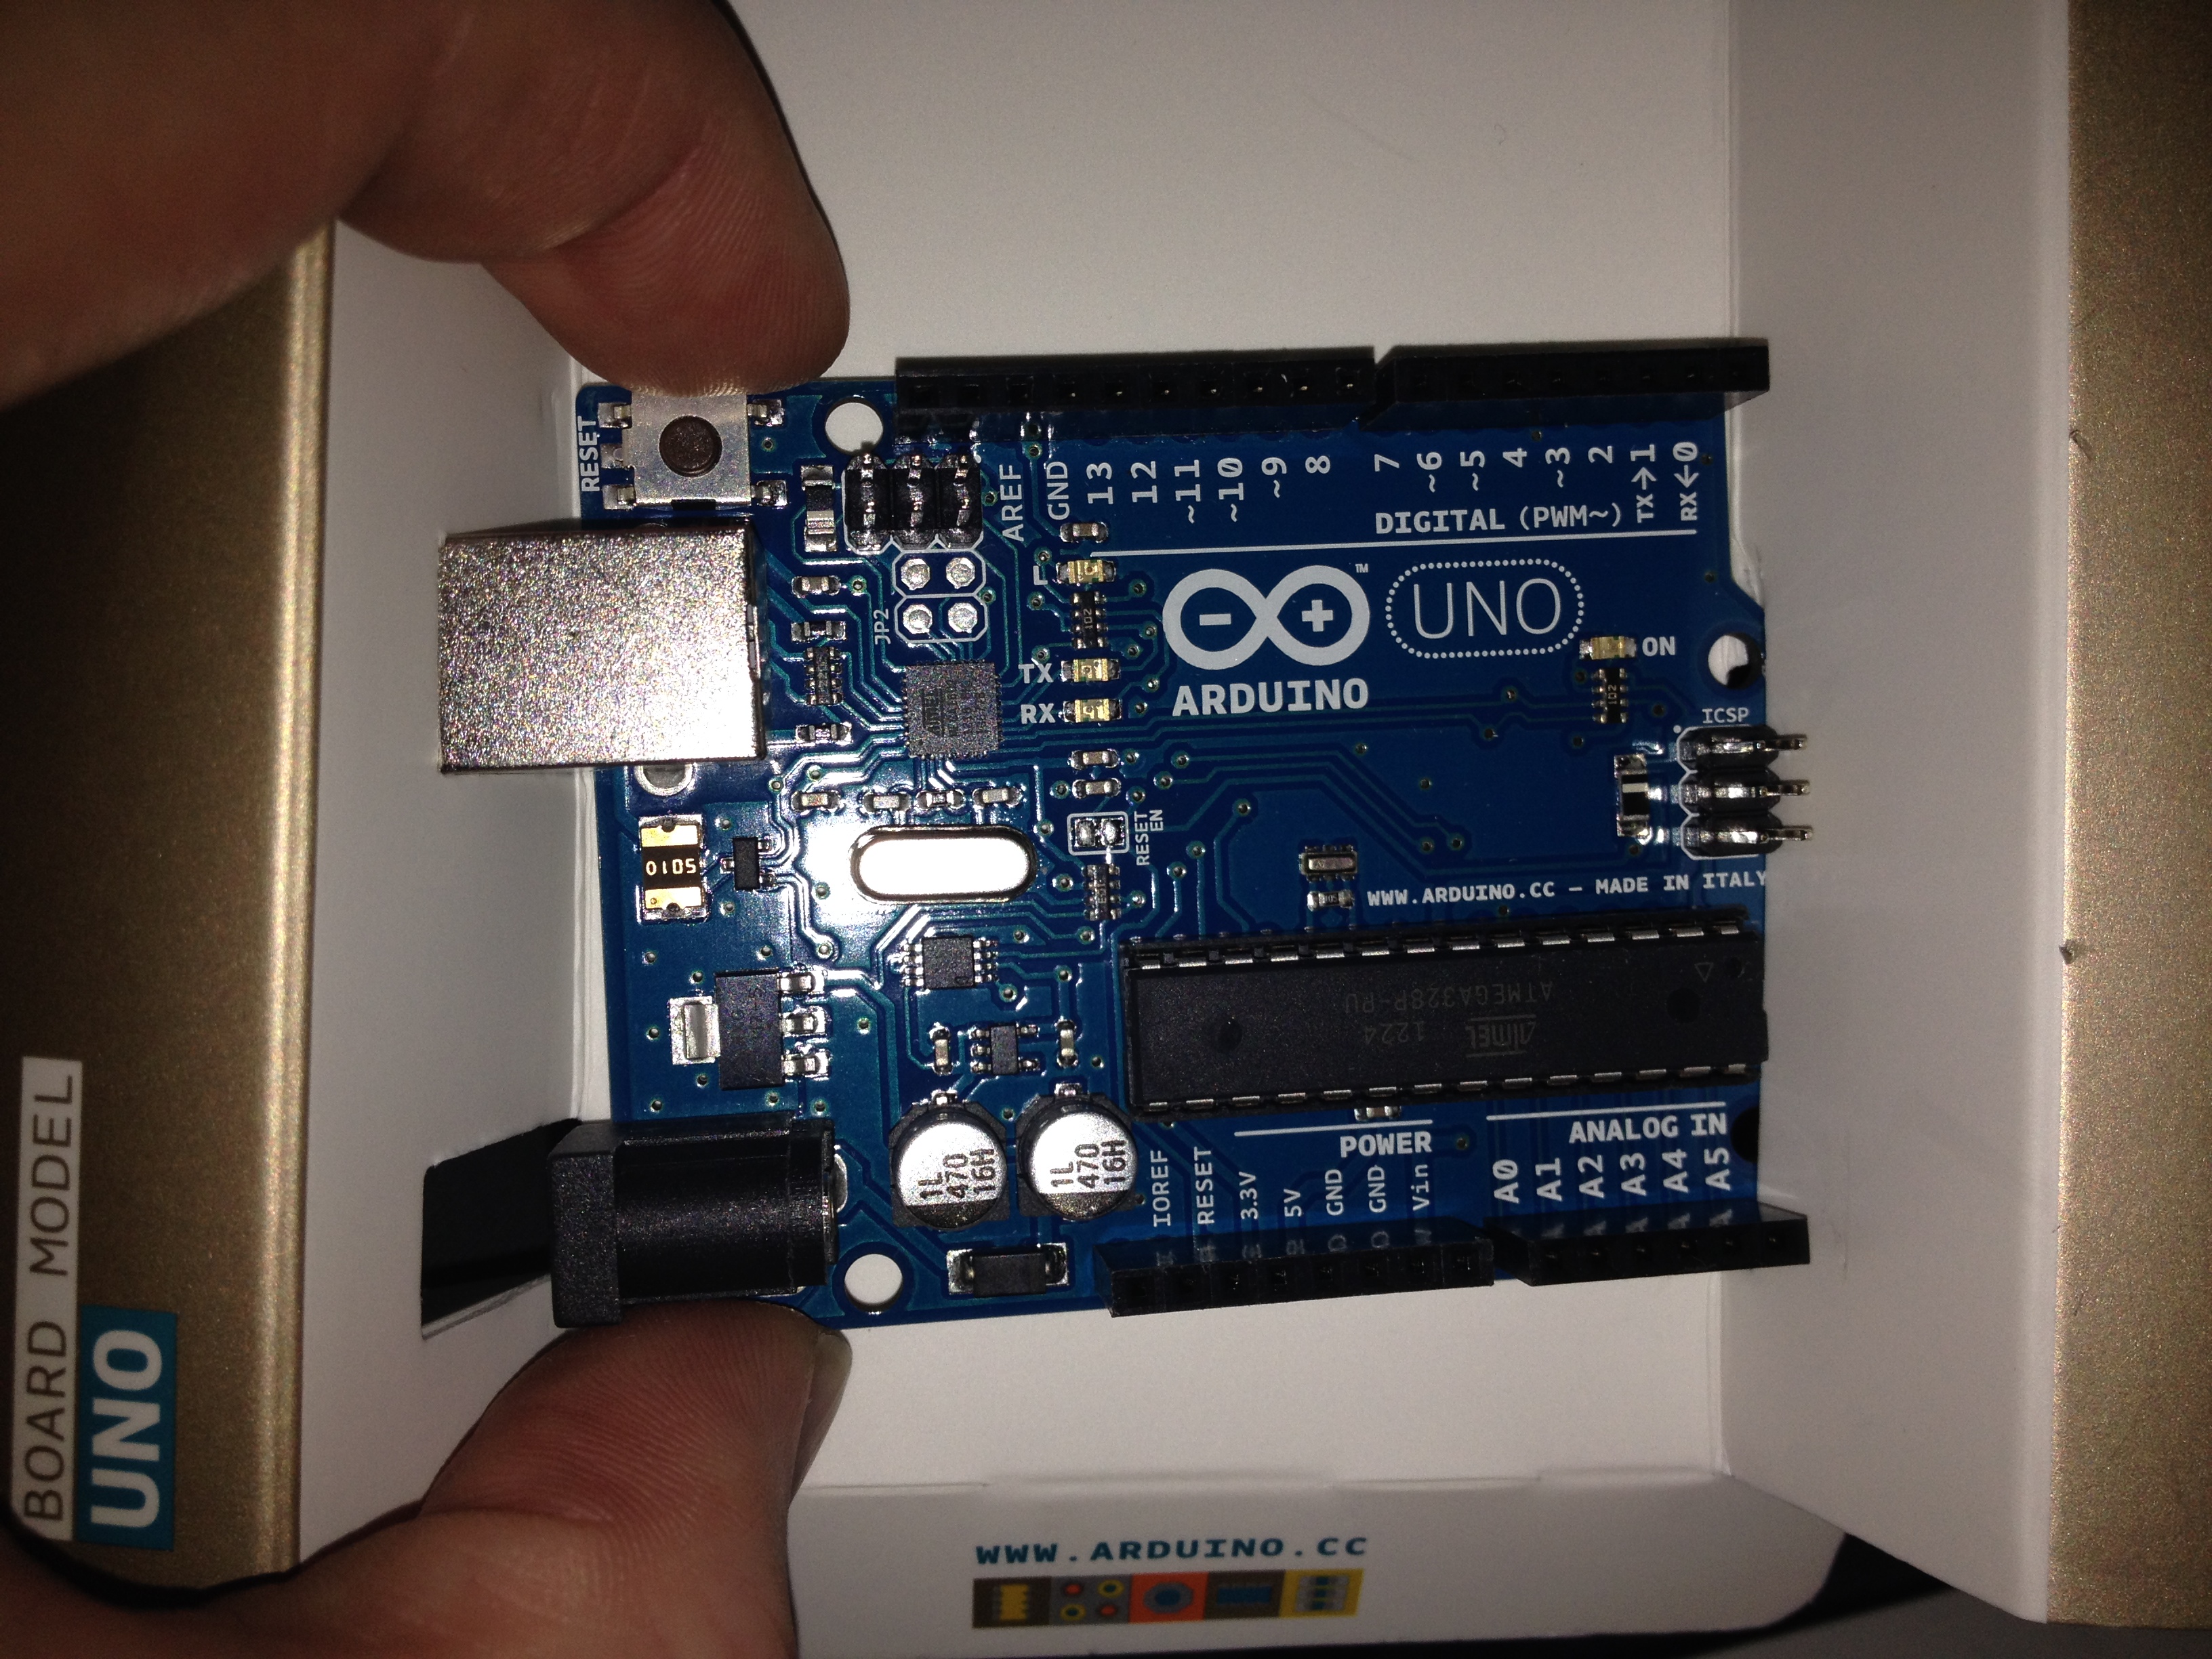
Arduino Uno
At the heart of the control system hardware is an Arduino Uno. The Uno is a development board that breaks out an ATMega328p microscontroller chip. A microcontroller is a small, simple computer that is on a single chip. It can run code and interact with hardware. The development board provides the peripherals needed for the chip, including a power supply, a USB connection, and electrical headers for connecting other devices.
On the Uno is an Arduino Ethernet Shield. This is a separate board that plugs right into the top of the Arduino Uno and instantly adds additional circuitry for more functionality. The Ethernet Shield allows the Uno to communicate over an ethernet connection. Shields can be stacked, so all the same headers are available for use.
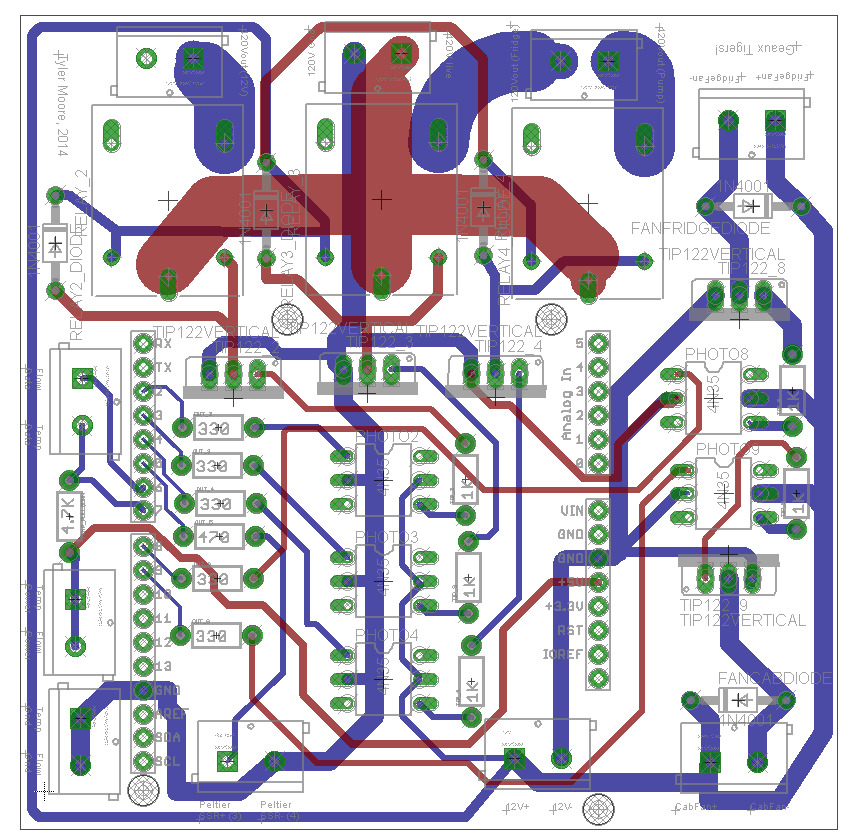
PCB Diagram generated by EAGLE
On top of the Ethernet Shield is another shield, one I designed for this purpose. This project requires multiple devices, and while I’m not too great with a soldering I’m pretty good with CAD. I used the free version of CadSoft’s EAGLE PCB Design Software to design a circuit board. I then submitted the design to OSH Park, a company that batches PCB fabrication, and a few weeks later I had my custom board.
The custom shield has three mechanical relays for high voltage switching, several optocouplers and transistors, and multiple appropriate resistors and protection diodes. The board also has connection terminals for 12V power input, a solid state relay, a Hall effect sensor, and a 1-Wire connection. This allows the shield to:
-
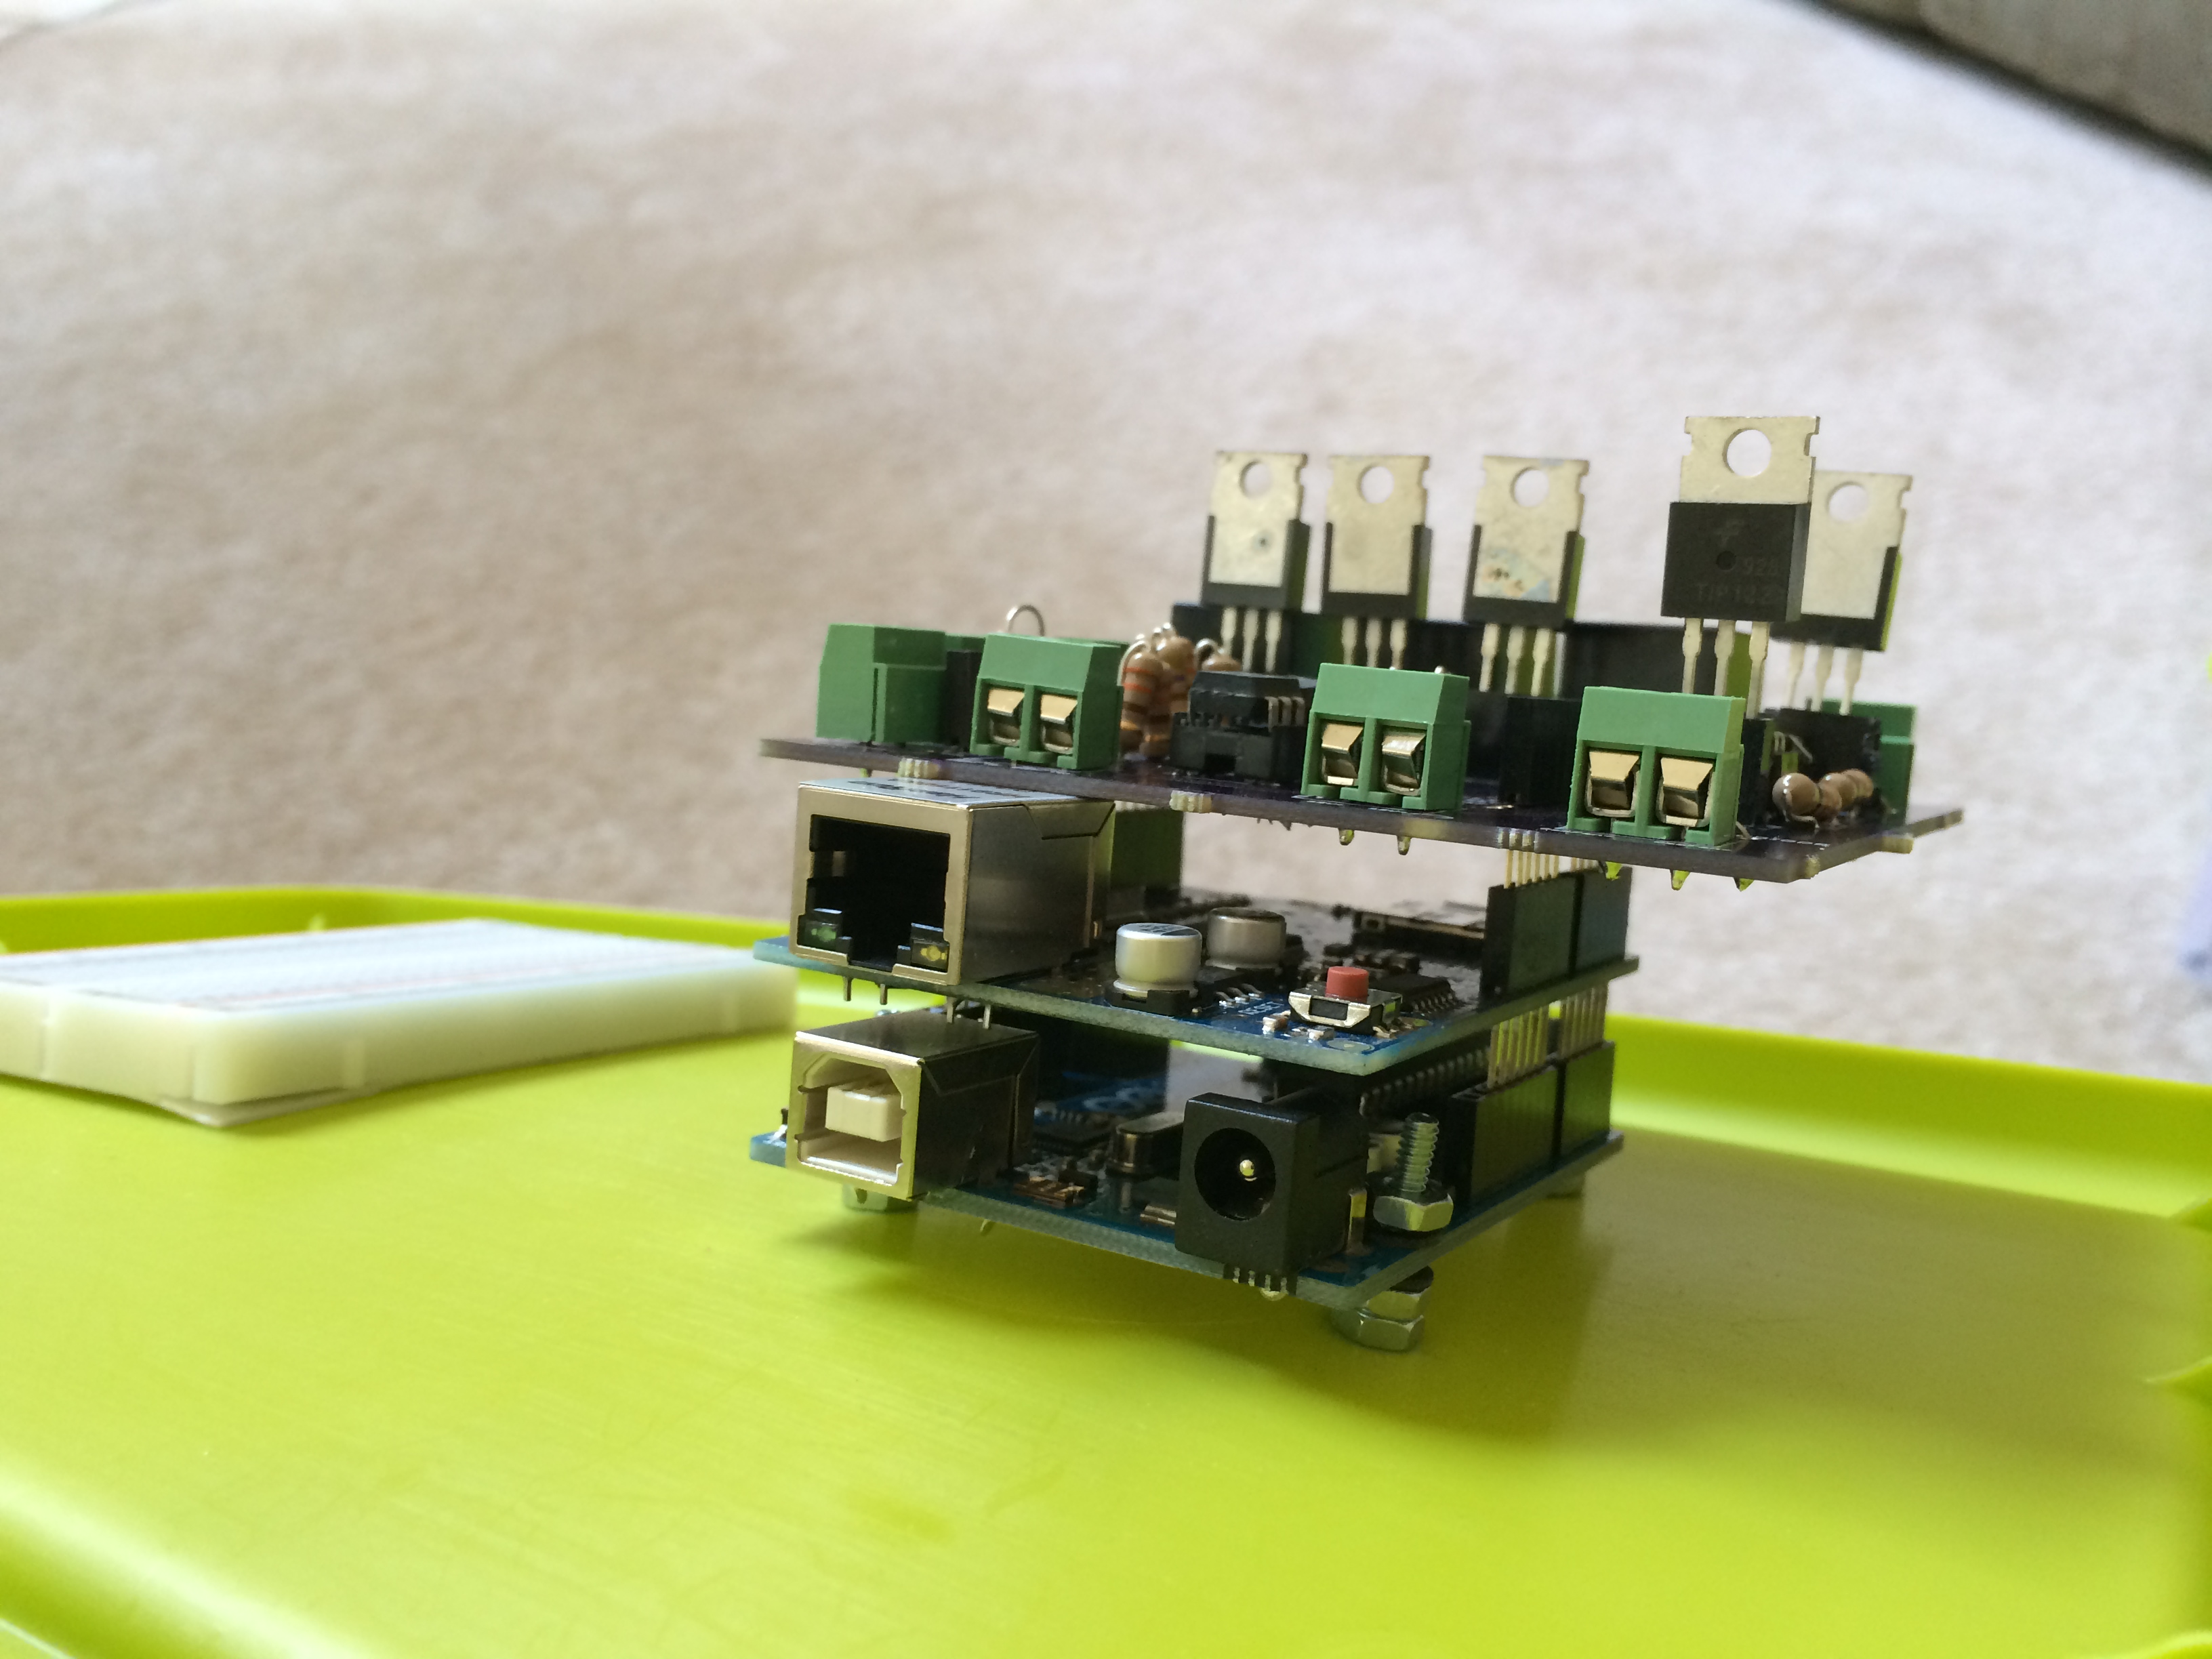
Arduino Uno, Ethernet Shield, and Custom Shield
Read temperatures from multiple 1-Wire DS18B20 thermometers
- Read coolant flow rate from a Hall effect flow sensor
- Control the 120VAC power to a refrigerator, a large 12V power supply, and a pump
- Throttle output from the 12V power supply to thermoelectric chips using an off-board solid state relay
- Control fans on the thermoelectric chips
- Control a fan on the radiator

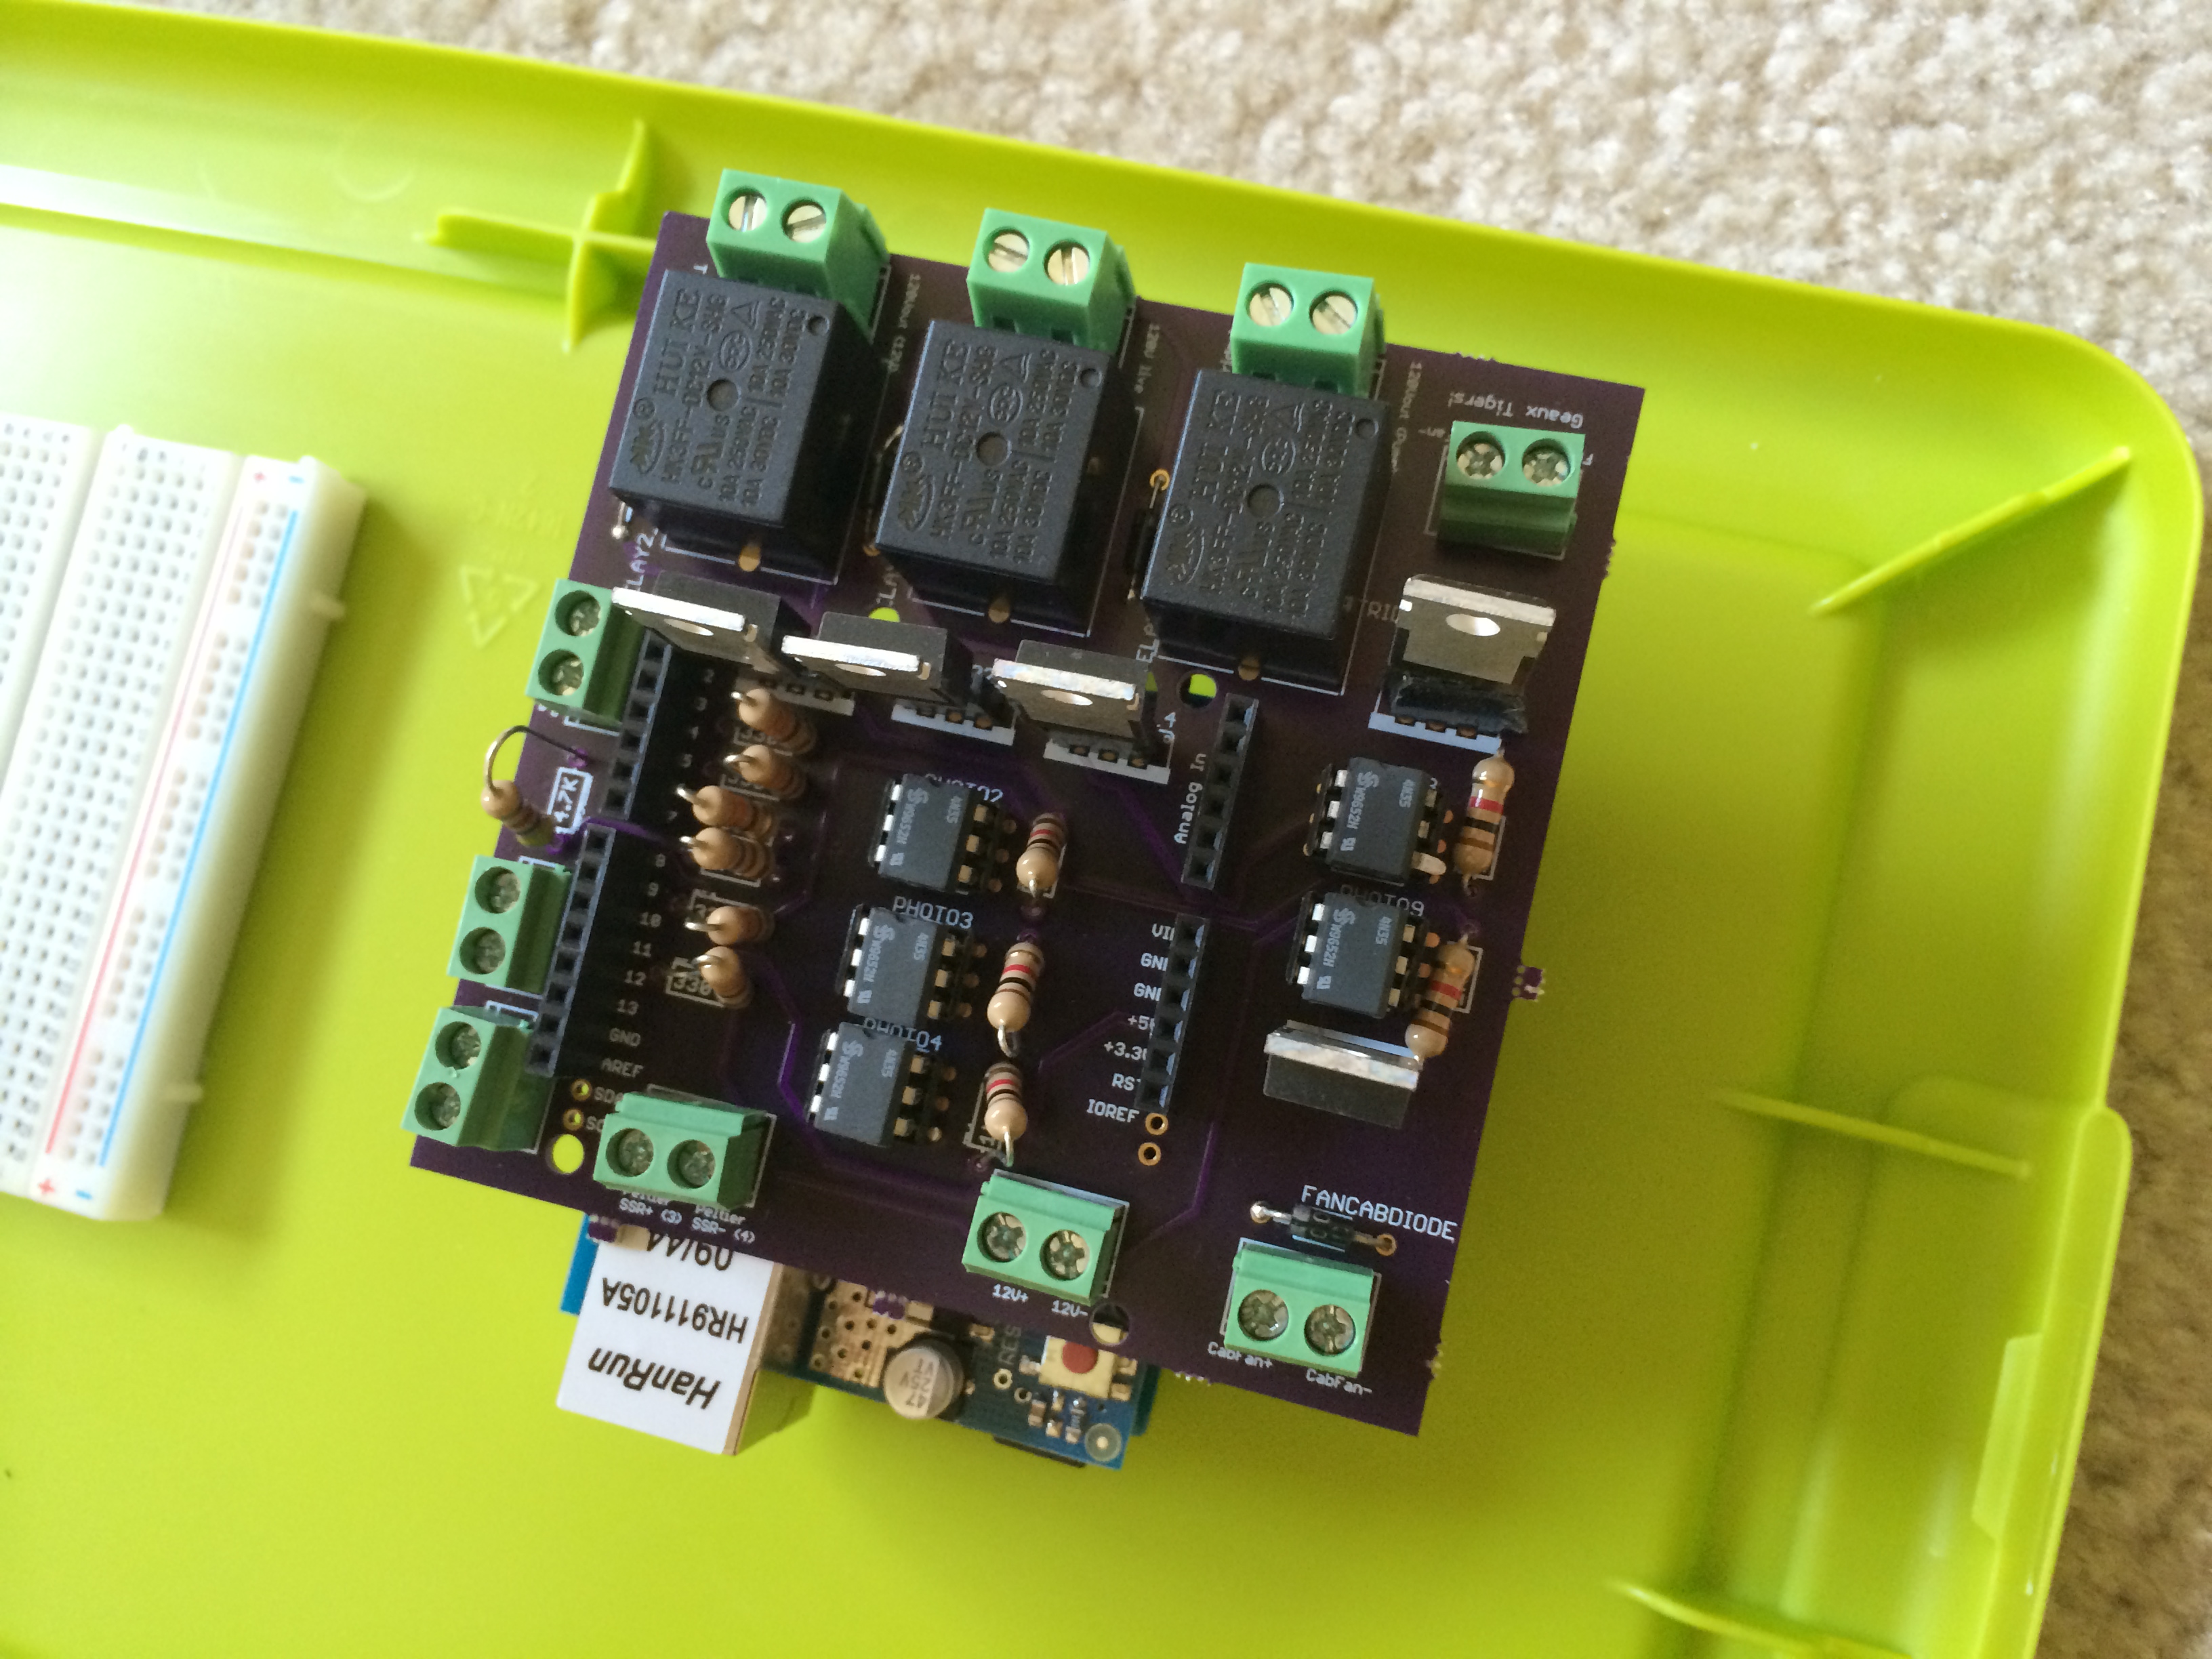
Custom Shield with components
The Ethernet Shield is connected to a small WiFi device that is configured to act as a bridge to my home network. I have a Raspberry Pi running the Raspbian OS that acts as a lightweight server. The Raspberry Pi logs data from the cabinet and allows me to monitor and change the cabinet settings via internet.
I do my diagrams in TinyCAD. You can see them in my Dropbox.
Software
There are three layers of software involved with the cabinet.
First, there is the code running on the ATMega328p microcontroller on the Arduino Uno. This code is really just C++. It’s a relatively long sketch that uses several custom libraries and accomplishes the following:
- 1-Wire communication using a third-party library for thermometer measurements
- PID-based control of heating/cooling mode
- PID throttling of heater power in heating mode
- PID control of refrigerator time on
- Logical control of power to pump
- Safety checks with output override to safe mode in case of out of bounds temperatures
- Implementation of a custom communication protocol and use of that protocol over Ethernet connection using the Arduino Ethernet library
Second, there is the code running on the Raspberry Pi server. This is a java program that is automatically started when the server boots. This accomplishes the following:
- Implements a Java version of the C++ communication protocol used on the Arduino
- Receives data from the Arduino every second over my home network
- Logs second, averaged minute, and averaged hour data
- Serves data to my client software over the internet
- Passes commands from the client to the Arduino to change settings such as temperature setpoints and mode
Lastly, I have a Java-based client with a JavaFX GUI that:
- Connects to the Raspberry Pi to download logged data, which is displayed graphically
- Allows the user to send setting changes to the Arduino via the server
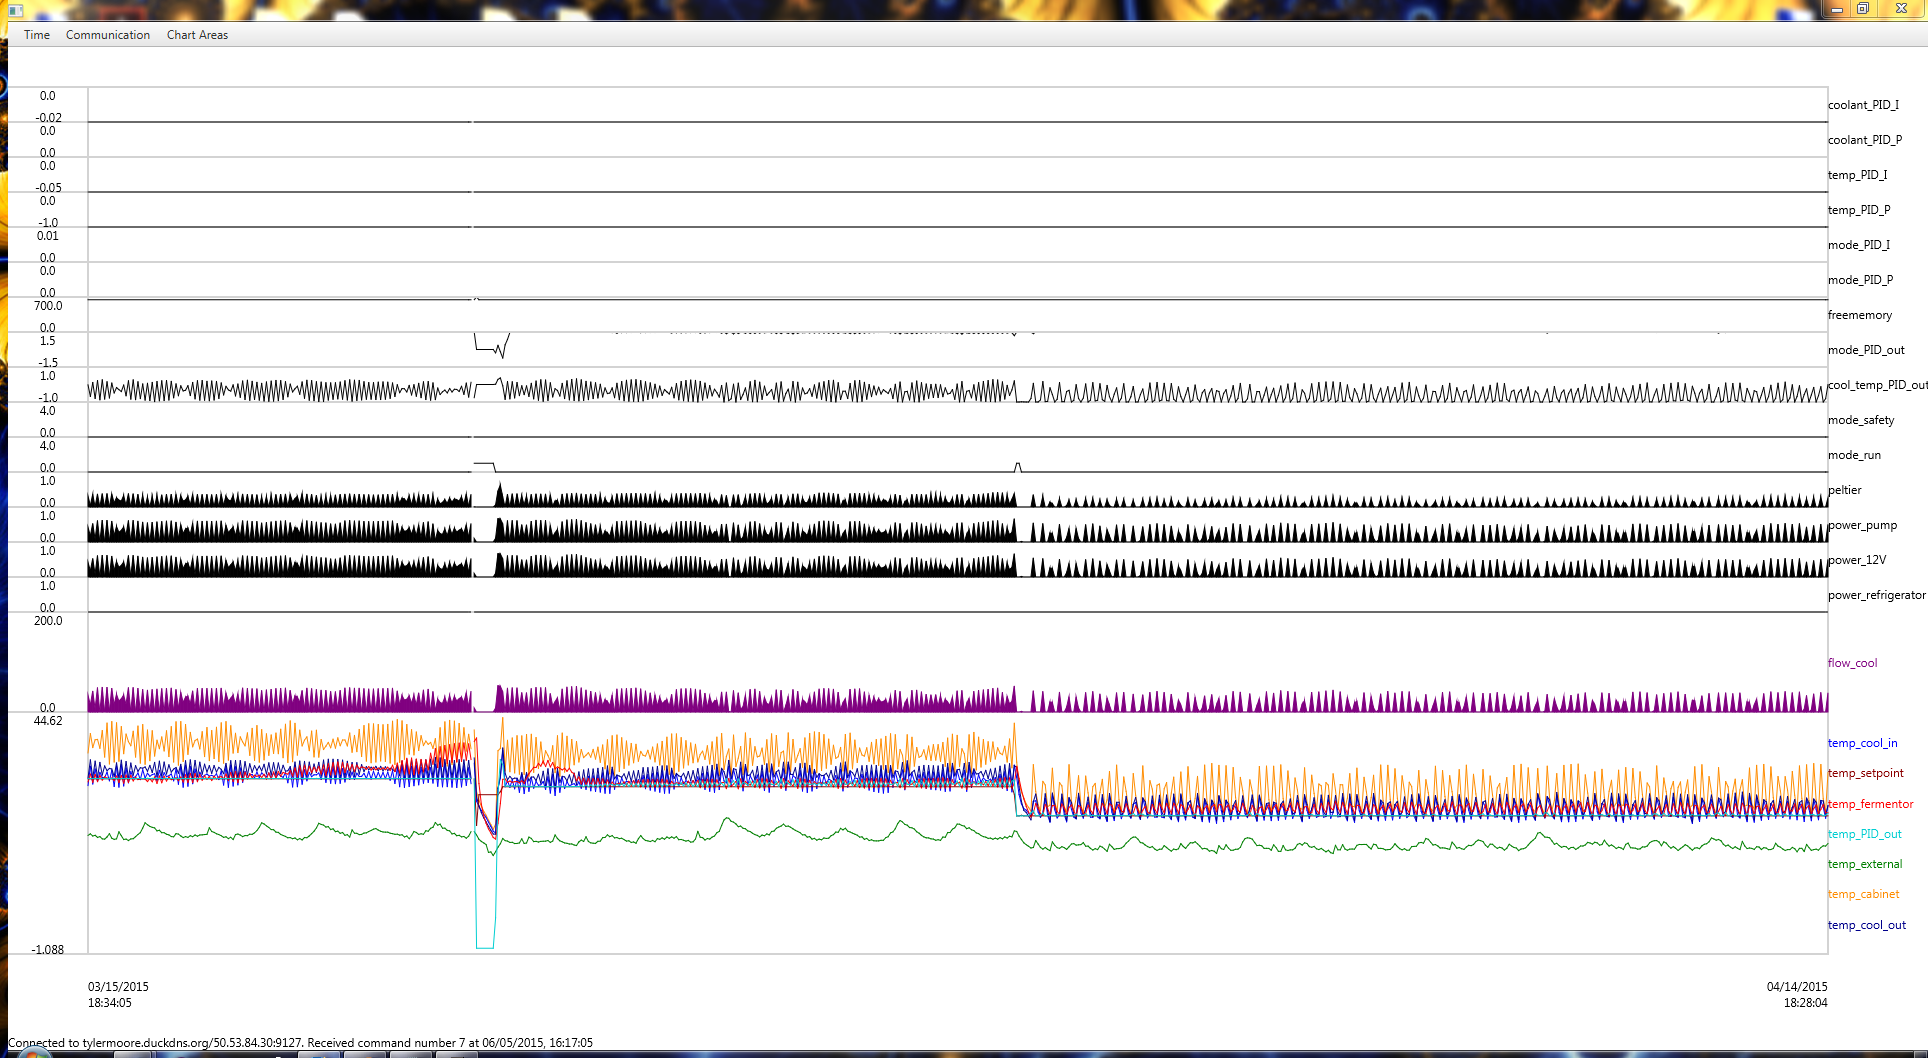
Screenshot of charted values including temperature, flow, switch values, and control parameters.
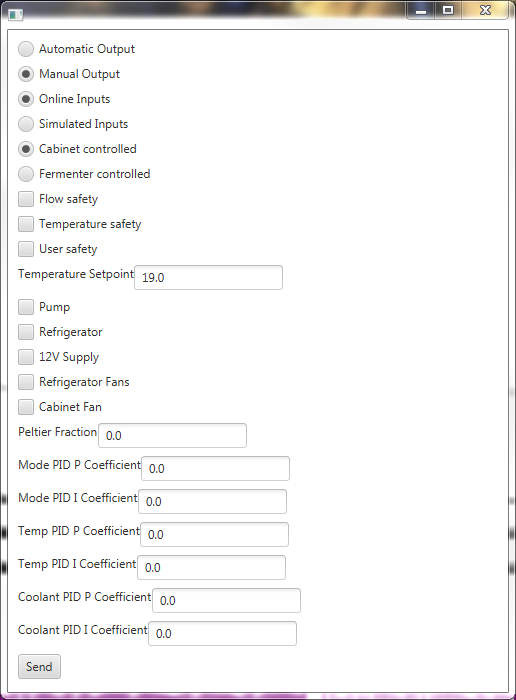
Screenshot of control parameters.
Pingback: Under Pressure! | Overdesigned Brewing
Pingback: Better with Family | Overdesigned Brewing
Pingback: Santos – Overdesigned Brewing